/Website / How to create and edit an auto webinar?
Content
To create an auto webinar, go to «Website» — «Webinars» and click «Create a webinar».

Enter the name of the auto webinar, click «Create webinar». 
Then enter the link to your video from YouTube in the shown format and click «Next».
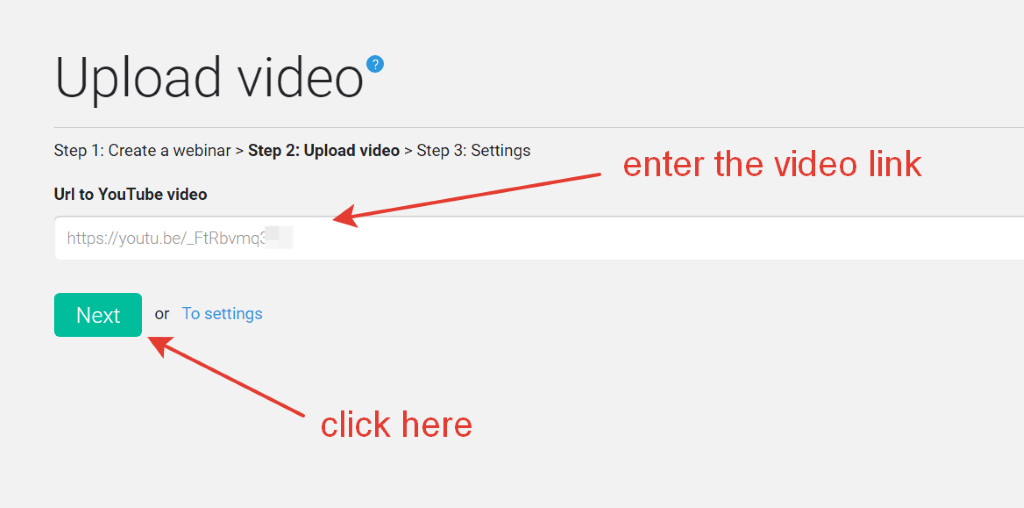
Then you will see the Auto webinar Settings Panel with several tabs. We will go through each tab.
Settings
Define the Main Settings for your auto webinar in the Settings tab.
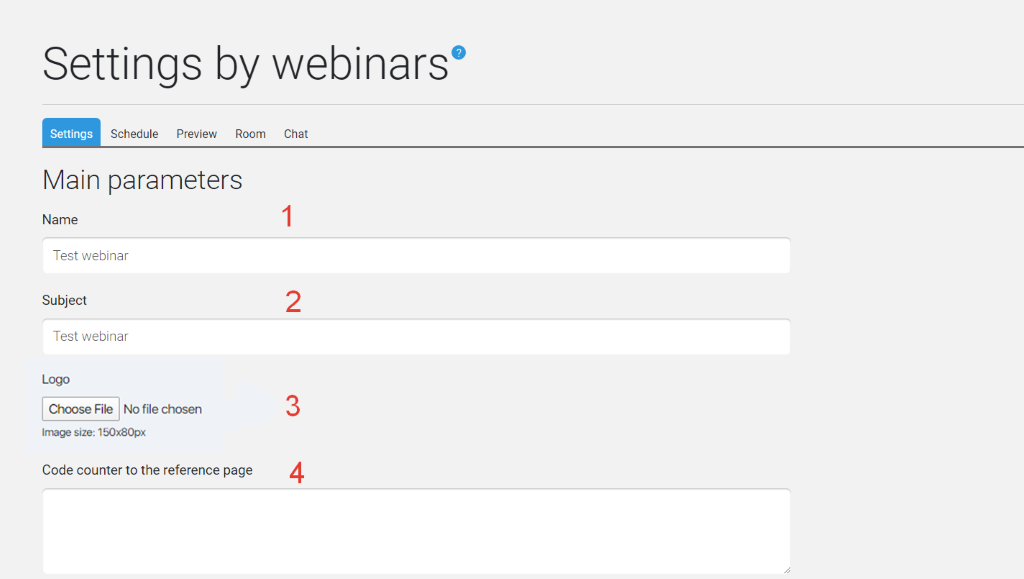
- Name of the auto webinar. It will be displayed on the subscription page
- The topic of the auto webinar. The topic will be displayed at the subscription, timer, and auto webinar broadcasting pages.
- This picture will be displayed in the upper middle part of the auto webinar broadcasting page.
- Code counter to the reference page. This field helps set the metrics code at a timer page to get the webinar attendance data.
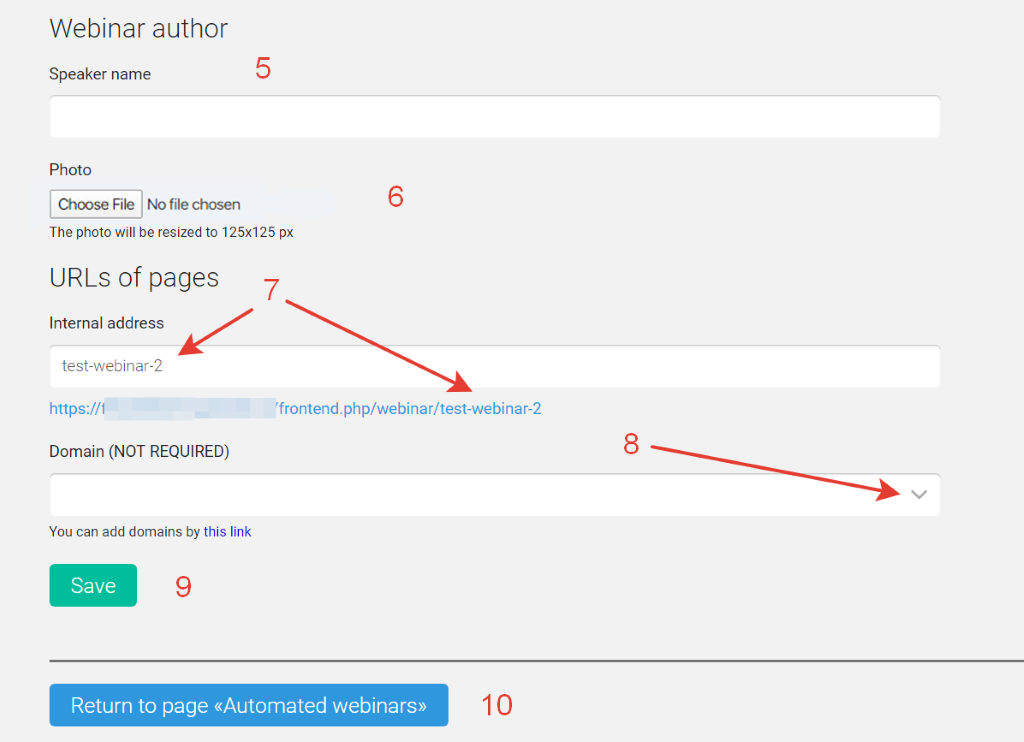
- and 6. Name and photo of the speaker. When you add the name and the photo of the auto webinar speaker, they will be displayed at the subscription and countdown timer pages at the beginning of the auto webinar.
7. Internal address. Enter the name of the auto webinar in Latin characters. It will be displayed at the end of the auto webinar subscription page link.
8. Domain. You can choose one of your personal domains from the drop-down list delegated to InfluencerSoft by clicking the arrow to the right in the line. In this case, the auto webinar link will be displayed in the chosen domain.
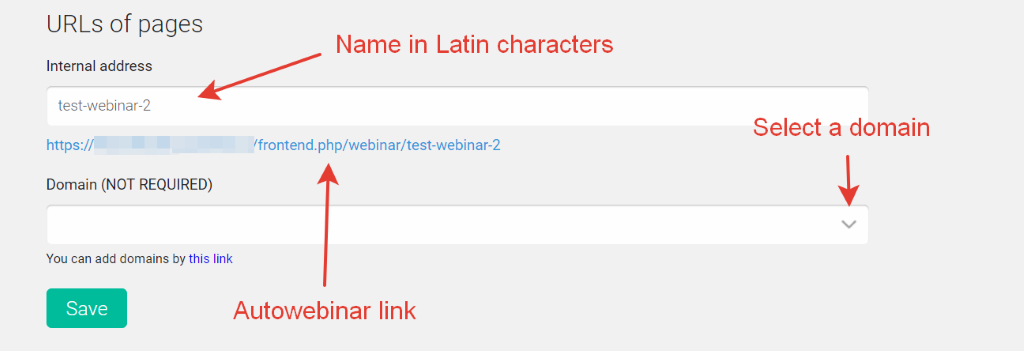
Click Save and the Main Settings are now defined Note: Changes at each tab could be saved separately.
Schedule
This tab sets the schedule for the auto webinar broadcast.
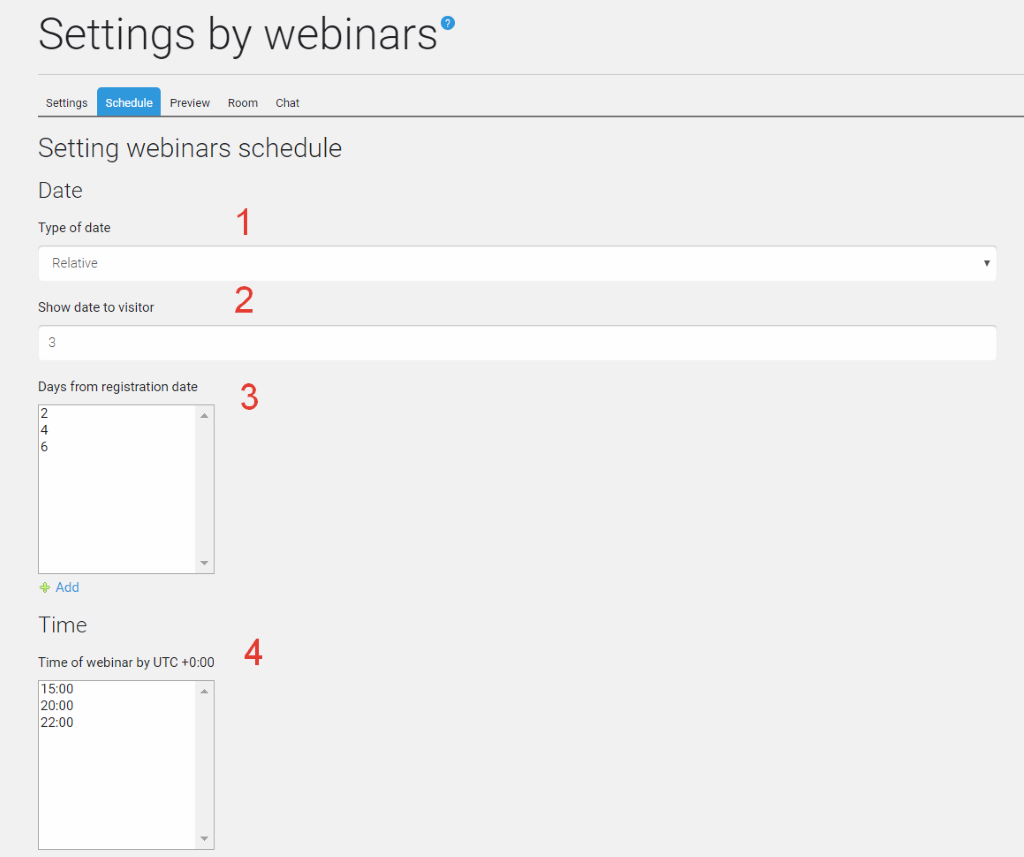
1.Select the dates for the auto webinar. They could start from the subscription date, on particular days of the week (for example, each Saturday), or on specific dates. An auto webinar cannot be repeated endlessly. It is closer to a live event.
2. This will show the subscriber the number of dates available for viewing the webinar.
3. If the date is the start of the subscription date, you will need to specify how many days after the subscription date a subscriber can watch a webinar.
4. You can specify the time options for watching a webinar.
Under the time settings window, you will see more settings. Here you can:
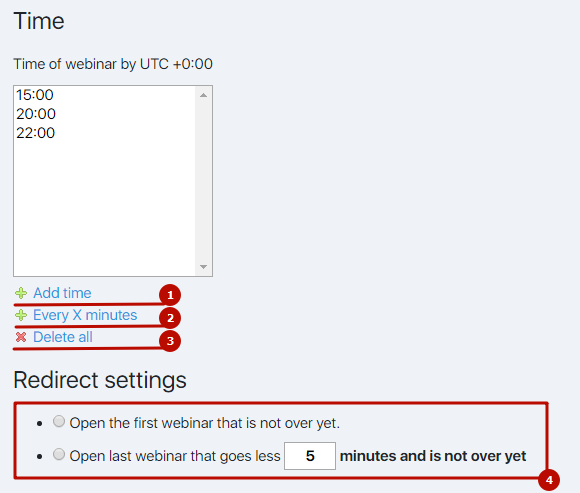
1. Adds the exact time of the auto webinar sessions.
2. Adds auto webinars every 5, 10, 15, etc. minutes (in this case, all time values in the interval you specified will be added to the time window).
3. Deletes all values from the time settings window.
4. Selects the option to redirect a participant in an auto webinar. Depending on the value you have selected, by clicking on the link of the auto-webinar, the participant will open either the first auto-seminar that has not yet ended or the last of the webinars broadcast at the moment less than the time you set.
Save these settings and move to the next tab.
Preview
This tab shows two links, by clicking them at any moment you can see how the main page of the auto webinar will be displayed.
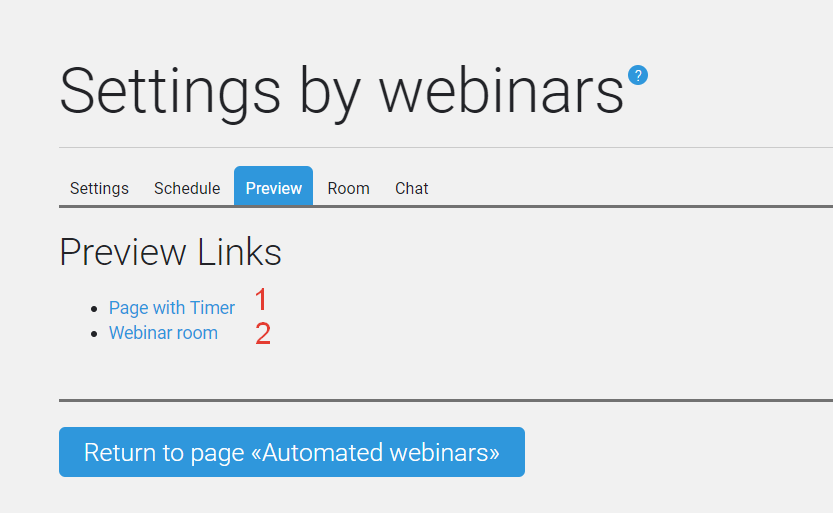
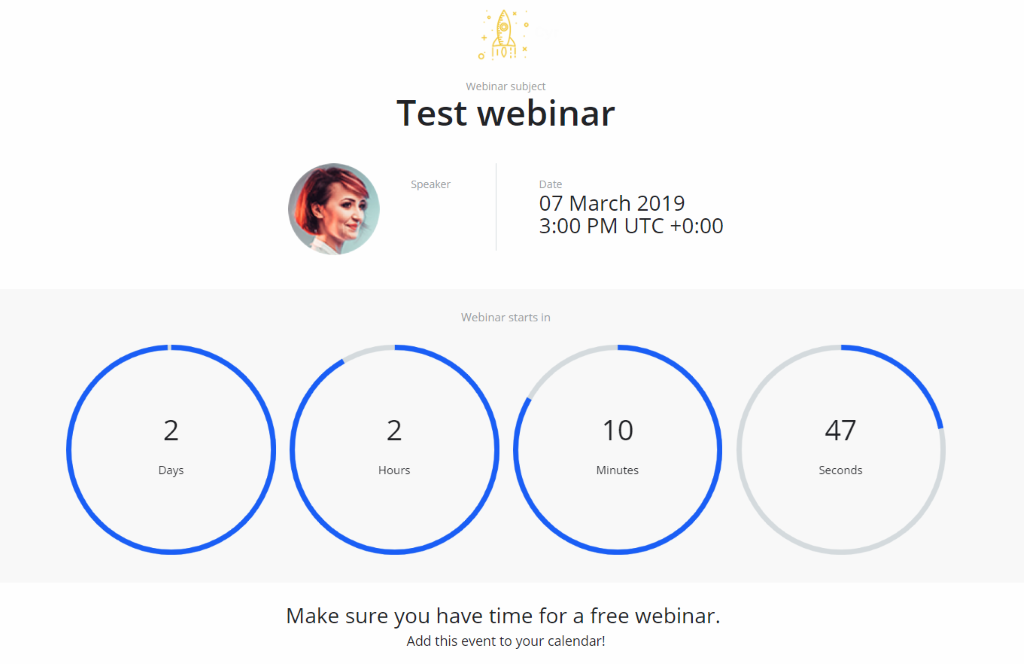
1. Page with timer. Here a subscriber will see how much time left to the event.
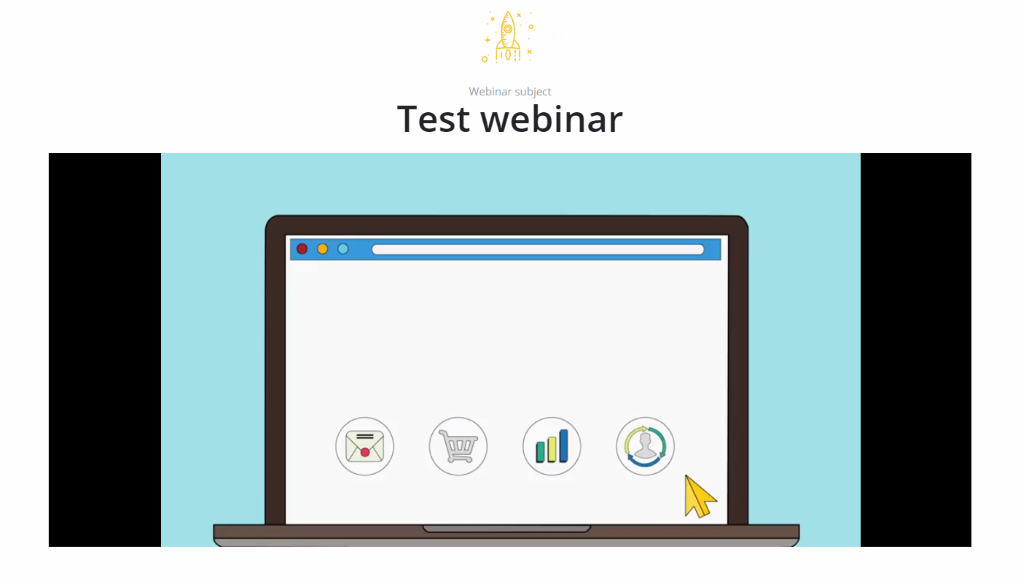
2. Webinar room. This page displays how the auto webinar broadcasting page looks like.
Room
Let us move to the settings of the webinar room.
This tab looks as follows:
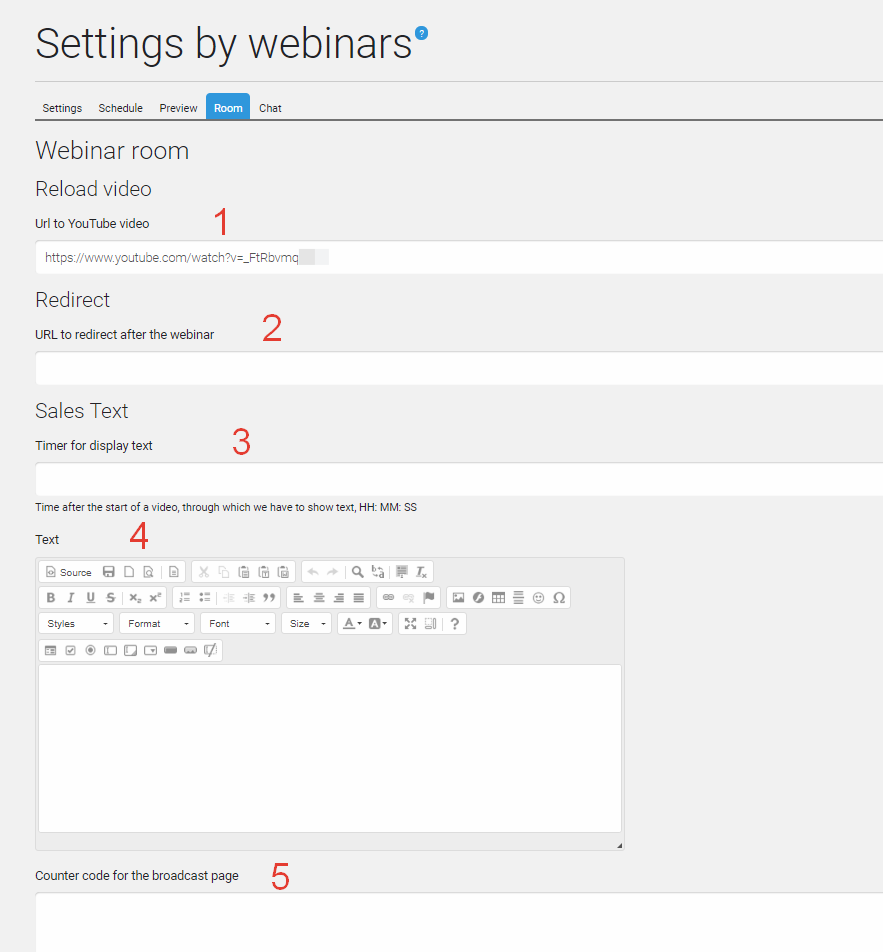
1.URLto YouTube video. Here we can see a video link which we enter when creating an auto webinar. But it can be changed at any time in the Room tab, if necessary.
2. URL to redirect after the webinar. If you enter the link to your landing page, the user will be automatically redirected to this page once the auto webinar is over.
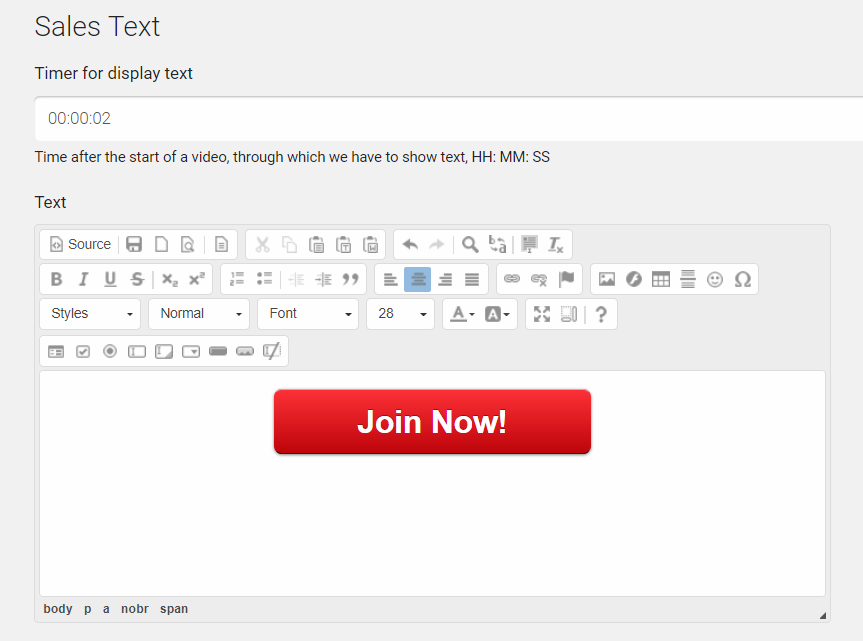
3. Timer for display text. Auto webinars provide you with a way to increase sales – a pop-up button that appears with the link to a fee-based offer.
Here you can set the time after the start of the video, when the text will pop up. The time is entered as HH: MM: SS.
4. Here you can write the details of your fee-based offer, or add a button to the landing page, or a checkout page.
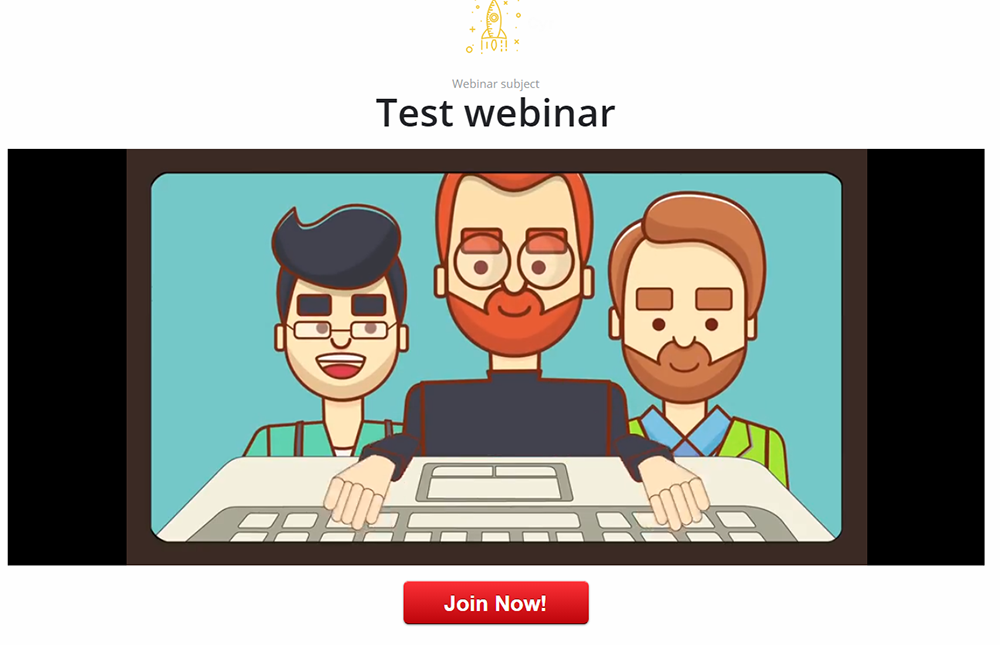
For example, if you add this button:
It will look as follows on the broadcast page.
5.Counter code for the broadcast page. Here you can add analytics code (or another html/css/js code) to get the statistics about the page visits and to understand when and how many subscribers visit your auto webinar.
Chat
This tab sets the presentation of the comments to make the event look like a live event.
There are three options for comment presentation.
No comments. No comments will be displayed in the auto webinar.
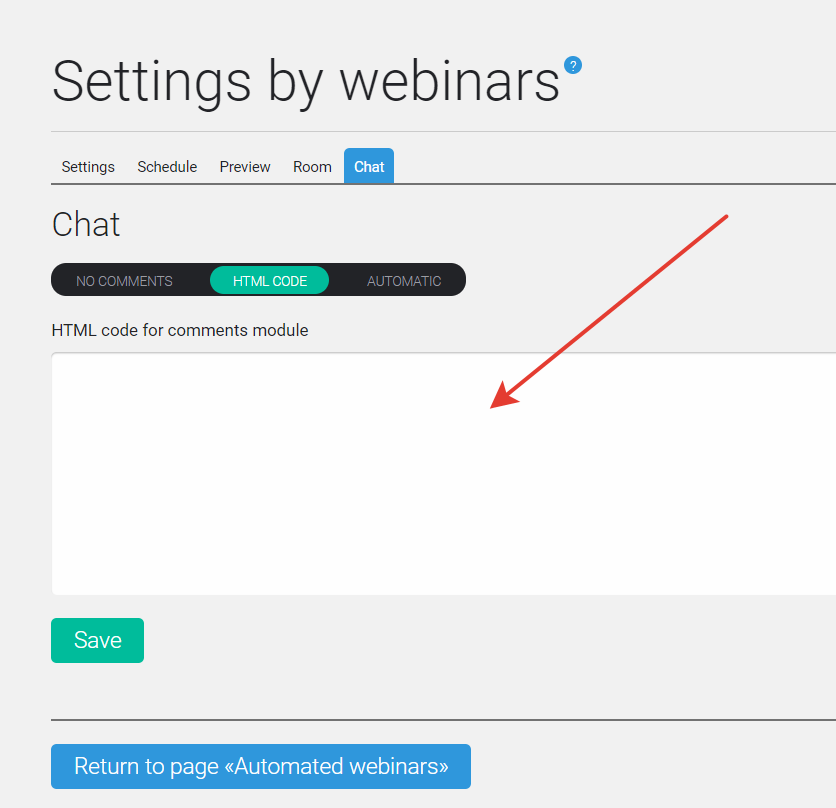
HTML-code. You may embed the code of Facebook comments or the comments of other social media platforms and answer the questions of the participants online.
Automatic comments. You may upload the names of the commentators and their comments in chronological order.
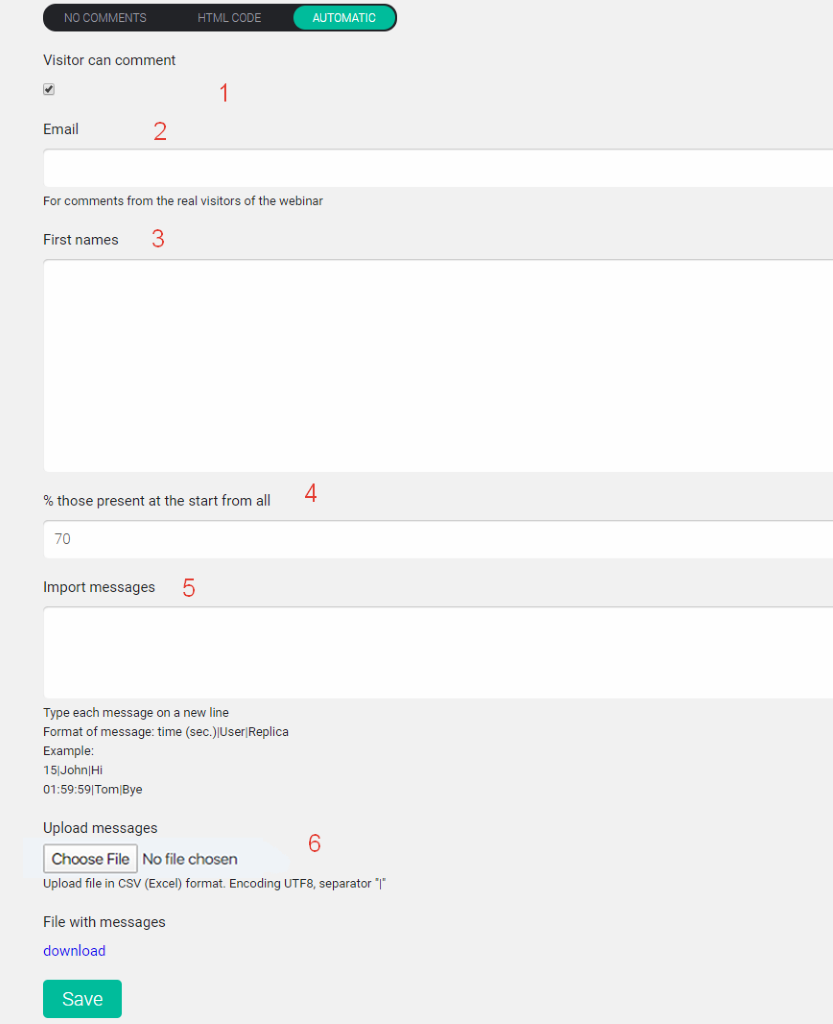
1. Checking the box allows visitors to comment. If this option is enabled, then a visitor can ask questions or write comments during the auto webinar.
2. You can enter an email address that will receive the comments from visitors to the webinar.
3. Names. Here you can add a list of visitors' names (just like in a live webinar where we can see a list of the attendees).
4. The percentage of the visitors at the start of the webinar. Like a live webinar, not all visitors join the event at its start, and you can set the percentage of the webinar visitors at its start.
5. Import messages. Pay attention to the format they are imported into for correct view. This is shown under the message insert field.
6. Upload messages from a file. Also, pay attention to the format of the messages given in this field.
Click Save when the settings on this tab are ready.
How to insert a clickable hyperlink to the auto webinar chat?
Comments with clickable links should be uploaded in this format:
|
1 |
1|Alex Grey|<a href="https://example.com/">website</a> |
Where:
1 – Is a numerical number of a comment.
Alex Grey – Is the name and surname of the commentator.
https://example.com/ – Is the address of the page which opens by clicking the link.
Note that the quotation marks in the comments must be straight to make a clickable link work.
Articles:
How to make a broadcast page for a webinar in 5 minutes
Creating and Editing Pages in the Page Builder
Comments
0 comments
Please sign in to leave a comment.